


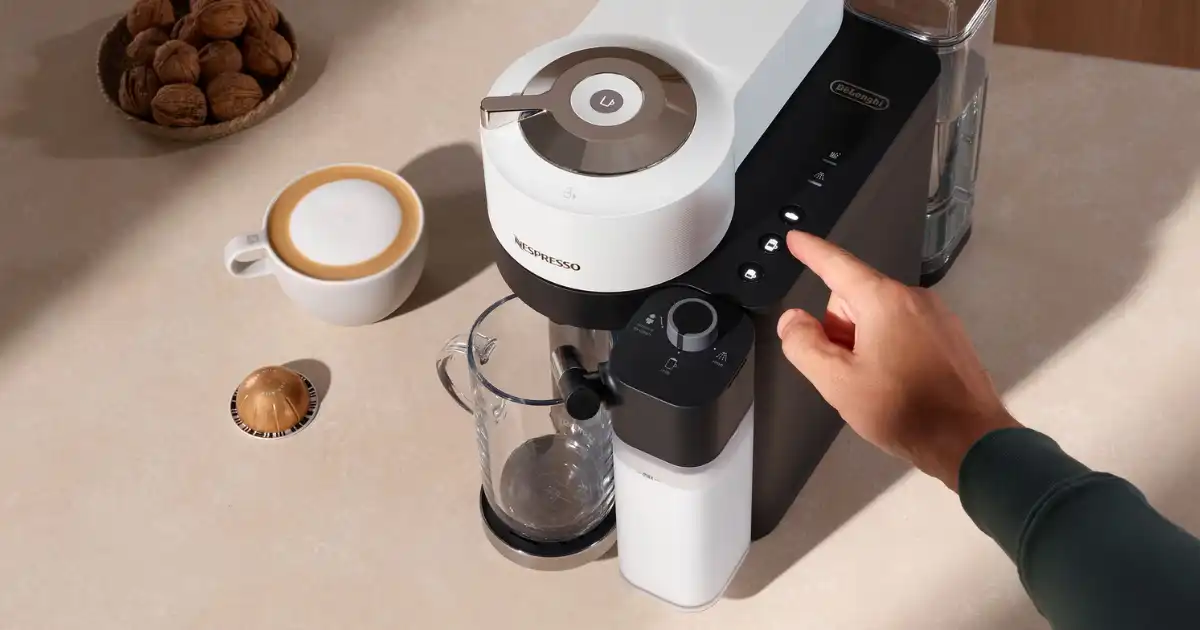
If you’ve ever stared at your Nespresso machine wondering how to make that café-style latte at home, you’re not alone. Milk transforms a simple espresso into something creamy, comforting, and versatile. How To Add Milk To Nespresso?
But milk is tricky too hot, too cold, or poorly frothed, and it can ruin a drink that otherwise smells amazing. I’ve spent years experimenting with Nespresso machines and milk, testing temperatures, frothers, and pouring techniques, so I can tell you what really works, what’s worth skipping, and how to get reliable results without a barista certification.
In this guide, I’ll walk you through the ins and outs of using milk with Nespresso. You’ll learn how milk texture interacts with espresso, practical methods for adding milk, step-by-step instructions, and common mistakes that trip people up. By the end, you’ll have a solid understanding of how to make lattes, cappuccinos, and other milk-based drinks that actually taste like they belong in a coffee shop.
Milk With Nespresso
Milk isn’t just a filler for coffee it’s a flavor and texture enhancer. The right milk can balance espresso’s bitterness, add sweetness, and create a luxurious mouthfeel. In my experience, the difference between “meh” and “wow” coffee often comes down to milk temperature and texture rather than the beans.
When I talk about milk texture, I mean two things: steamed milk and frothed milk. Steamed milk is smooth and slightly warm, perfect for lattes and flat whites. Froth adds air, creating that fluffy layer on cappuccinos or macchiatos. Full-fat cow’s milk generally froths best because of its natural proteins and fats, but I’ve had success with oat milk and barista blends for non-dairy options though they behave differently under heat.
Milk also affects flavor perception. Cold milk can mute espresso’s aroma, while over-heated milk can taste scorched or sweetened in a weird way. Understanding these interactions helps you choose the right milk and technique for each drink.
Methods to Add Milk
Pouring Milk Directly
The simplest method is pouring milk straight from a jug or carton. Works fine if you just want a splash of milk in an espresso or an Americano. In my experience, this is best for people who aren’t fussy about foam and just want creaminess. Pour cold milk slowly into your cup after brewing to avoid splashes. Tip: warm the milk slightly in a microwave or on the stove if you want a more harmonious temperature.
Using a Milk Frother
Frothers are the magic wand for home baristas. Nespresso’s Aeroccino or similar frothers can create both hot and cold froth in seconds.
Here’s what I’ve learned in practice:
-
Full-fat milk gives the fluffiest foam.
-
Heat the frother before adding milk to avoid cold spots.
-
Don’t overfill; froth needs room to expand.
Cold froth works great for iced lattes, while hot froth creates creamy cappuccinos. My tip: swirl the frother gently after it stops to settle the foam; it prevents giant bubbles and creates a velvety texture.
Steam Wand / Built-In Milk System
Some Nespresso machines, like the Lattissima or Creatista models, have built-in steam wands. In my experience, these deliver café-level milk texture if you get the technique right. Hold the jug at a slight angle, submerge just the tip, and introduce air slowly for froth. Tilt the cup and swirl milk after steaming to mix layers smoothly.
The caveat: steam wands take practice. Too much air = bubble overload, too little = flat milk. I’ve seen people waste liters before they hit that silky microfoam perfect for latte art, so patience pays off.
Step-by-Step Guide
Here’s my go-to routine for a Nespresso latte at home:
-
Brew a shot of espresso directly into your cup. I prefer the Vertuo Plus for consistent crema.
-
While espresso brews, heat your milk (either in a frother or on the stove). Aim for 60–65°C (140–150°F).
-
Froth the milk until smooth and velvety, not bubbly.
-
Pour steamed milk slowly over espresso, holding back foam with a spoon if needed. Top with froth.
-
Optional: sprinkle cocoa or cinnamon for that café touch.
This process takes less than five minutes once you’ve practiced.
Tips for Perfect Milk
Here are some real-world tricks I’ve picked up:
-
Always start with cold milk straight from the fridge warmer milk never froths as well.
-
Use fresh milk; older milk produces thinner foam and less flavor.
-
Swirl milk before pouring to integrate microfoam and avoid separating layers.
-
Avoid overheating: anything above 70°C (160°F) can scald milk, ruining texture and sweetness.
-
Experiment with milk ratios: some lattes are 1:1 milk to espresso, others lean heavier on milk for creaminess. Find your sweet spot.
Common Mistakes to Avoid
-
Overheating milk
burns flavor and kills froth.
-
Pouring foam first
creates an uneven mix; pour liquid milk first, foam last.
-
Using non-barista milk blindly
not all plant milks froth well; oat barista blends work best.
-
Overfilling frother
foam has nowhere to expand, creating dense bubbles or overflow.
Popular Nespresso Milk-Based Drinks
-
Latte
Espresso + lots of steamed milk, thin foam on top.
-
Cappuccino
Equal parts espresso, steamed milk, and froth; foam is thick and airy.
-
Flat White
Similar to latte but less milk, microfoam for velvety texture.
-
Macchiato
Espresso “stained” with just a dollop of froth.
-
Iced Coffee
Cold espresso poured over milk and ice, optionally topped with cold froth.
Each drink responds differently to milk temperature and froth level, so I tweak technique depending on what I want in the cup.
Milk Alternatives
Non-dairy milks can work beautifully if you know their quirks:
-
Oat milk
Barista versions froth well and taste sweet.
-
Soy milk
Froths well but can separate if overheated.
-
Almond milk
Thin, less stable froth; works best cold.
-
Coconut milk
Adds flavor, but doesn’t create traditional foam.
Pro tip: Always use the “barista” or froth-friendly versions. Non-dairy milk is more temperature-sensitive; heat slowly and don’t overdo it.
You Might Be Interested In
- Who Makes Solimo Coffee?
- Best 7 Nespresso Vertuo Travel Mugs On-the-go
- How To Descale Nespresso Essenza Mini?
- How To Make Cappuccino With Nespresso Essenza Mini?
- 7 Best Nespresso Vertuo Espresso Machines
Conclusion
Adding milk to Nespresso isn’t just a step it’s an art and a science. The milk you choose, its temperature, and your technique dramatically affect texture and flavor. Pouring directly, frothing in an Aeroccino, or using a steam wand all work, but each has its nuances, and practice is essential. Don’t expect perfection on day one; experimenting teaches you what your milk and machine respond to best.
The key takeaway: prioritize milk quality, temperature control, and foam technique. Understand how milk interacts with espresso, respect its limits, and you’ll consistently create creamy, satisfying drinks at home. With these practical insights, you’re not just adding milk you’re elevating your Nespresso experience.
FAQs about How To Add Milk To Nespresso?
Can I brew coffee directly into milk?
Yes, you can brew espresso directly into milk, and some people call this shortcut a “caffè latte trick.” In practice, it works best if you’re in a hurry or don’t mind slightly cooler espresso. The drawback I’ve noticed is that the milk can absorb some of the crema’s aroma and slightly cool the espresso too quickly, which changes the flavor profile.
For the richest taste and best texture, I usually brew the espresso first into a cup, then add milk or foam afterward. This method preserves the crema and allows you to control the temperature of your final drink, giving a more balanced latte or cappuccino experience.
What’s the ideal milk temperature for frothing?
The sweet spot for milk temperature is around 60–65°C (140–150°F). At this range, the milk is hot enough to mix smoothly with espresso without scorching, and the proteins in the milk form a stable, velvety microfoam. Heating milk above 70°C (160°F) often kills the delicate proteins, resulting in a flat, less creamy texture and a slightly burnt taste. Cold milk, on the other hand, won’t froth properly.
In my experience, the key is to heat slowly and monitor with a thermometer if you’re just starting out; with practice, you’ll get a feel for it just by touch or sound as the milk spins in the frother.
Which milk frother is compatible with Nespresso?
Nespresso machines are compatible with several types of milk frothers, but the most popular is the Aeroccino series. These frothers can make both hot and cold foam, and they generally pair well with any espresso shot from Vertuo or Original machines. Some Nespresso machines, like the Lattissima or Creatista models, come with built-in steam wands that froth milk directly in the jug.
In my experience, external frothers are easier for beginners and more forgiving when experimenting with different types of milk, while steam wand systems offer more control and café-style results once you’ve mastered the technique.
Can I use plant-based milk?
Absolutely, but not all plant-based milks behave the same way. Oat milk barista blends are the most reliable for frothing, giving creamy, stable foam that mimics dairy. Soy milk can froth well too, but it’s sensitive to overheating and may separate if you get the temperature wrong.
Almond, rice, or coconut milks are trickier; they often produce thin, airy foam that deflates quickly. In my experience, the key is to use barista-specific blends designed for steaming or frothing and to adjust your technique slightly stir gently, avoid overheating, and be ready for a slightly different texture than cow’s milk.
How do I clean my frother?
Cleaning your frother immediately after use is essential. Milk residue can build up quickly and affect both taste and foam quality over time. For an Aeroccino, rinsing the jug and whisk with warm water is usually enough; most parts are also dishwasher-safe, which is convenient.
For machines with steam wands, wiping the wand with a damp cloth and purging steam after each use prevents clogging and bacterial buildup. In my experience, skipping this step even once can leave a sour film in your next batch of milk, so I treat cleaning as part of the ritual, not an optional chore.