


Your Cuisinart coffee maker is a convenient and reliable appliance that makes brewing your morning cup of joe a breeze. However, to ensure your coffee is ready when you need it, it’s essential to set the correct time on your coffee maker.
In this comprehensive guide, we’ll walk you through the step-by-step process of setting the time on various Cuisinart coffee maker models. Whether you have a basic model or a more advanced one with additional features, we’ve got you covered.
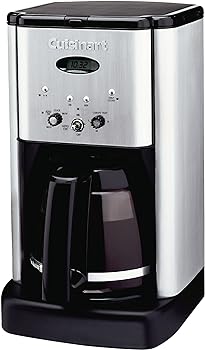
Setting the Time on Basic Cuisinart Coffee Makers
Basic Cuisinart coffee makers are simple to use, and setting the time is a straightforward process.
Here’s how to do it:
Step 1: Plug in the Coffee Maker
Ensure your Cuisinart coffee maker is properly plugged into a working electrical outlet. It’s essential to have a power source for the display and clock functions to operate.
Step 2: Locate the Clock Button
Most basic Cuisinart coffee makers have a “Clock” button. This button is usually located on the control panel of the coffee maker. Refer to your user manual to find the exact location of your specific model.
Step 3: Set the Time
Press and hold the “Clock” button until the time display starts flashing. This indicates that you are in the time-setting mode. Release the button.
Step 4: Adjust the Hours and Minutes
Use the “+” and “-” buttons to adjust the hours and minutes. Continue pressing these buttons until the correct time is displayed.
Step 5: Save the Time
Once you’ve set the time, press the “Clock” button again to save your settings. The time display should stop flashing and display the current time.
Your basic Cuisinart coffee maker is now set to the correct time, ensuring that your coffee is brewed when you want it.
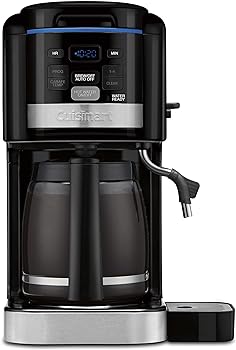
Setting the Time on Programmable Cuisinart Coffee Makers
Programmable Cuisinart coffee makers offer more advanced features, including the ability to schedule your brew time. Setting the time on these models is a bit more involved but still manageable.
Follow these steps:
Step 1: Plug in the Coffee Maker
Just like with basic models, make sure your Cuisinart coffee maker is plugged into a functioning electrical outlet.
Step 2: Locate the “Program” Button
Look for the “Program” button on your coffee maker’s control panel. This button is typically used for setting the time and programming your brew cycle.
Step 3: Access the Time-Setting Mode
Press and hold the “Program” button. The display will start flashing, indicating that you’ve entered the time-setting mode.
Step 4: Set the Time
Use the “+” and “-” buttons to adjust the hours and minutes. Continue pressing these buttons until the desired time is displayed.
Step 5: Program Your Brew Time
After setting the current time, press the “Program” button again to enter the programming mode. You can now set the time you want your coffee to start brewing. Adjust the hours and minutes using the same buttons.
Step 6: Save Your Settings
Once you’ve set the desired brew time, press the “Program” button once more to save your settings. The display should stop flashing and display the current time.
With the time and brew cycle programmed, your Cuisinart coffee maker will automatically start brewing at your chosen time each day.
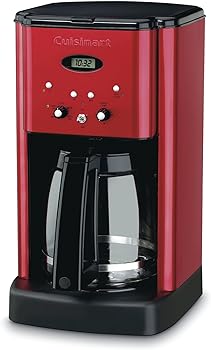
Setting the Time on Cuisinart Grind & Brew Coffee Makers
Cuisinart Grind & Brew coffee makers have the added functionality of grinding your coffee beans before brewing.
Setting the time on these machines involves a few extra steps:
Step 1: Plug in the Coffee Maker
As always, ensure your Cuisinart Grind & Brew coffee maker is properly plugged in.
Step 2: Locate the “Clock” Button
Find the “Clock” button on the control panel. It’s the key to setting the time on your coffee maker.
Step 3: Enter the Time-Setting Mode
Press and hold the “Clock” button until the time display begins to flash.
Step 4: Adjust the Hours and Minutes
Use the “+” and “-” buttons to adjust the hours and minutes. Continue pressing these buttons until the correct time is displayed.
Step 5: Set Your Grind & Brew Preferences
After setting the current time, press the “Grind Control” button to adjust your grind preferences if needed. This button is usually marked with icons representing different grind levels.
Step 6: Save Your Settings
Press the “Clock” button again to save the time and grind settings. The time display should stop flashing and display the current time.
Setting the time on your Cuisinart Grind & Brew coffee maker ensures that your freshly ground coffee is ready when you want it.
Setting the Time on Cuisinart Single-Serve Coffee Makers
Cuisinart single-serve coffee makers are compact and designed for making one cup of coffee at a time.
Setting the time on these models is a quick and easy process:
Step 1: Plug in the Coffee Maker
Make sure your Cuisinart single-serve coffee maker is plugged into a functioning outlet.
Step 2: Locate the “Clock” Button
Look for the “Clock” button on the control panel. It’s typically located alongside the other function buttons.
Step 3: Enter Time-Setting Mode
Press and hold the “Clock” button until the time display starts flashing.
Step 4: Adjust the Hours and Minutes
Use the “+” and “-” buttons to adjust the hours and minutes. Keep pressing these buttons until the correct time is displayed.
Step 5: Save Your Settings
After setting the time, press the “Clock” button again to save your settings. The time display should stop flashing and display the current time.
Your Cuisinart single-serve coffee maker is now set to the correct time, ensuring you get your freshly brewed cup when you need it.
Conclusion
Setting the time on your Cuisinart coffee maker is a fundamental task that ensures your coffee is brewed precisely when you want it. Whether you have a basic model or a more advanced programmable coffee maker, the process is relatively straightforward. Just follow the steps outlined in this guide to set the time for your specific Cuisinart coffee maker.
By following these instructions and addressing common time-setting FAQs, you can enjoy the convenience of having a fresh cup of coffee ready to kickstart your day. No matter which Cuisinart coffee maker model you own, setting the time is an essential step toward achieving that perfect brew.
You Might Be Interested In
- How To Set Clock On Braun Coffee Maker?
- How To Clean Farberware Coffee Maker?
- How To Use Proctor Silex Coffee Maker?
- How to Use a Keurig?
- How to Use and Clean a Mini Milk Frother with Style
Frequent Asked Questions
What should I do if the time display doesn’t stop flashing after setting the time?
If the time display continues to flash after setting the time, it usually means that the coffee maker needs more time to save the settings. Press the “Clock” button again and wait for a few seconds. If the display doesn’t stop flashing, consult your user manual for specific troubleshooting steps.
Can I set the time without using the “Clock” or “Program” button on my coffee maker?
The “Clock” or “Program” button is the standard method for setting the time on Cuisinart coffee makers. If your model doesn’t have these buttons, consult your user manual for alternative instructions or contact Cuisinart customer support for guidance.
Do I need to set the time every day, or does it save automatically once set?
Once you set the time on your Cuisinart coffee maker, it should save your settings until there is a power outage or you unplug the machine. You don’t need to reset the time daily unless you encounter such interruptions.
How do I adjust the time for daylight saving time (DST)?
To adjust the time for daylight saving time, follow the same steps for setting the time on your coffee maker. Simply adjust the hours and minutes accordingly. Remember to account for the one-hour time change when DST begins or ends.
What if I can’t find the “Clock” or “Program” button on my Cuisinart coffee maker?
If your coffee maker lacks these buttons, consult your user manual for specific instructions on setting the time. Alternatively, check if there are any touchscreen or menu-based controls for time settings. If you can’t find any guidance, reach out to Cuisinart customer support for assistance.