


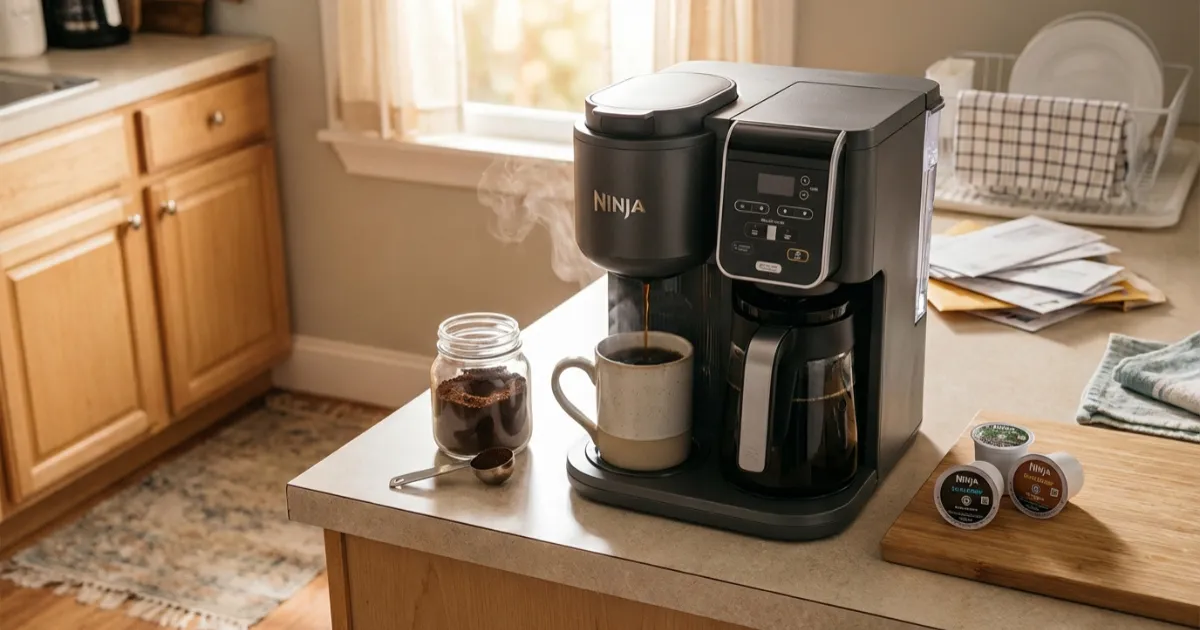
I’ve used the Ninja Dual Brew long enough to see the same pattern over and over: people buy it because it promises everything grounds, pods, iced coffee, carafes, frothing and then get frustrated when the first few cups taste weak, bitter, or just… off.
It’s not because you’re bad at coffee.
It’s because this machine does more thinking than you expect, and the manual doesn’t explain why things behave the way they do.
In my experience, most problems come from:
-
Using the wrong basket or pod adapter
-
Trusting default settings without understanding them
-
Treating pods and ground coffee like they work the same (they don’t)
-
Skipping setup steps that actually matter
This guide fixes that. I’m not rewriting the manual. I’m explaining how the Ninja DualBrew actually behaves on a real kitchen counter, with real mugs, real beans, and real mornings.
How I Test
I test coffee makers the same way most people actually use them—daily, over time, and without treating every brew like a lab experiment. My process starts with real-world setup, using tap water, standard mugs, common coffee brands, and both fresh and slightly stale beans to see how forgiving (or unforgiving) a machine really is.
I brew with both ground coffee and pods, rotating through Classic, Rich, and Over Ice settings across different cup sizes to understand how each mode behaves in practice. I intentionally make common user mistakes—wrong cup size, borderline grind, rushed setup—to see what breaks first and what the machine tolerates. I also pay close attention to consistency, noise, brew time, cleanup friction, and how performance changes after weeks of use, not just on day one.
If a result depends on model variation, water quality, or user habits, I say so clearly. I don’t chase perfect coffee; I test for repeatable, realistic results that normal people can achieve on a busy morning.
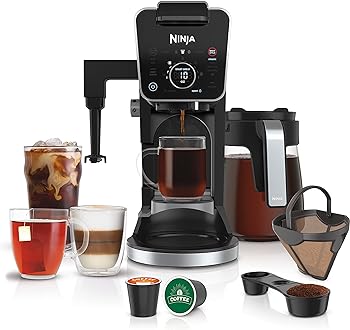
Quick-start: how to brew your first good cup (no fluff)
If you just unboxed it and want a solid cup without overthinking:
-
Decide: pods or grounds (don’t mix parts yet)
-
Fill the water reservoir past the cup size you plan to brew
-
Use the right basket
-
Grounds → coffee filter basket
-
Pods → pod adapter snapped in firmly
-
-
Choose “Classic” brew, not Rich or Over Ice yet
-
Match cup size to reality
-
10–12 oz mug → select 10 oz, not 12
-
-
Brew
That alone avoids about 70% of beginner mistakes.
Once that works, then you start dialing things in.
Understanding the parts (grounds vs pods , what actually matters)
This machine confuses people because it physically changes how water flows depending on what you install.
The ground coffee side
-
Uses a standard brew basket
-
Water flows slower and saturates the grounds
-
Grind size and amount matter a lot
The pod side
-
Uses a pod adapter, not the regular basket
-
Higher pressure, faster flow
-
Designed around K-Cup-style extraction, not flexibility
Big mistake I see:
People leave the pod adapter in and try to brew ground coffee. The result is thin, sad coffee every time.
If you’re brewing grounds, take the pod adapter out. Always.
Control panel & brew settings explained like a human
The buttons look simple. The behavior isn’t.
Brew styles (what they really do)
-
Classic
Balanced. This is where you should start. It’s forgiving. -
Rich
Slower flow, stronger extraction. Great for dark roasts or milk drinks. Too much coffee if your grind is already fine. -
Over Ice
Not just “hot coffee over ice.”
It brews concentrated on purpose. More on this later. -
Specialty (model dependent)
Small, strong shot-like brew. Not espresso. Useful, but niche.
Cup size buttons
These control water volume, not strength.
If your coffee tastes weak:
-
Don’t immediately blame the beans
-
Check if you selected too large a size
I regularly brew a “10 oz” into a 12 oz mug because strength matters more than filling the cup.
First-time setup
Things people skip that actually matter:
-
Run a full water-only cycle
Gets rid of plastic smell and primes the system. -
Rinse the basket and pod adapter
Factory residue is real. -
Set the clock (if your model has one)
Even if you don’t use delay brew, it affects internal timing.
Things you can ignore:
-
Fancy presets
-
Measuring spoon obsession (you’ll adjust by taste anyway)
Brewing with ground coffee
Single cup (my daily use)
Starting ratio (adjust from here):
-
1 level tablespoon per 5–6 oz of water
So for:
-
10 oz → ~2 tablespoons
-
12 oz → closer to 2.5
Grind size:
Medium. If it looks like powder, it’s too fine.
What most people get wrong:
-
Packing the grounds down (don’t)
-
Using too little coffee and blaming the machine
Carafe brewing
Carafe mode is more forgiving, but still:
-
Use fresh grounds
-
Fill the basket evenly
-
Choose Classic first, Rich if it tastes flat
If the carafe coffee tastes bitter, you’re probably:
-
Using too fine a grind
-
Or leaving it on the warming plate too long
Brewing with pods (what works, what doesn’t, common errors)
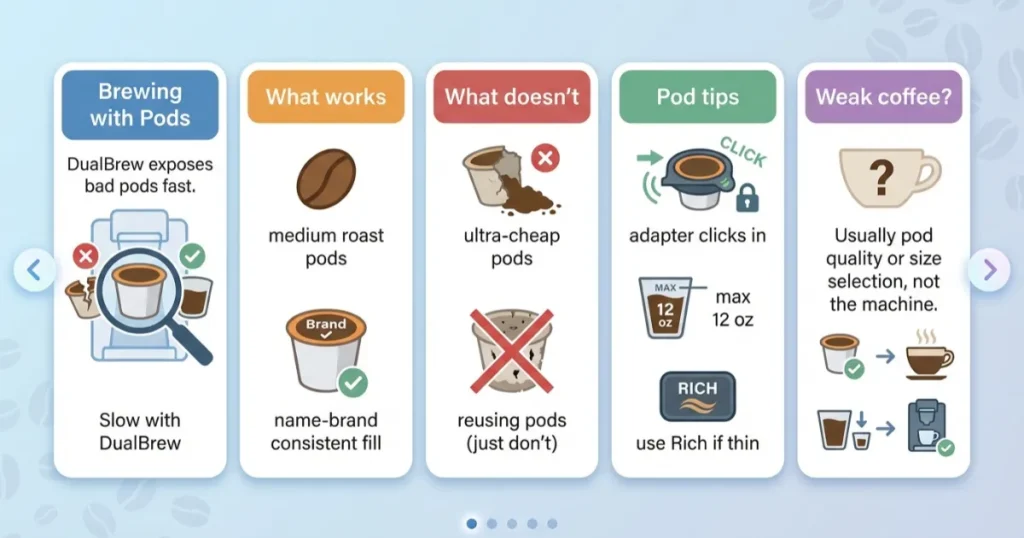
Pods are convenient, but the DualBrew exposes bad pods fast.
What works well:
-
Medium roast pods
-
Name-brand pods with consistent fill
What doesn’t:
-
Ultra-cheap pods
-
Reusing pods (just don’t)
Pod-specific tips
-
Make sure the adapter clicks in
-
Don’t exceed 12 oz unless you like watery coffee
-
Use Rich if the pod tastes thin
If you get weak pod coffee:
It’s usually not the machine it’s the pod quality or size selection.
Over Ice & iced coffee (why normal brewing fails here)
Most people mess this up.
Over Ice is NOT optional if you want iced coffee that doesn’t taste diluted.
Here’s why:
-
The machine brews hotter and stronger
-
It expects ice to melt and balance it out
How I do it:
-
Fill a sturdy cup with ice (half to ⅔ full)
-
Select Over Ice
-
Brew directly over the ice
-
Add milk after, not before
If you brew Classic over ice, it will taste weak. That’s not a flaw, it’s physics.
Using the frother (what it’s good for and what it’s not)
The frother is simple, and that’s okay.
What it’s good at:
-
Cold milk foam
-
Oat milk, almond milk
-
Light cappuccino-style drinks
What it’s not:
-
Espresso-quality microfoam
-
Hot steaming milk
Tip from experience:
-
Use cold milk for better foam
-
Rinse immediately after use or it gets gross fast
Cleaning & descaling (realistic schedules, not perfection)
Daily / every few uses
-
Rinse basket or pod adapter
-
Empty drip tray
Weekly (or when you remember)
-
Wash brew basket with soap
-
Wipe under the head (coffee splashes hide there)
Descaling
If you ignore this, the machine will punish you.
-
Every 2–3 months (sooner with hard water)
-
Use descaling solution or vinegar (rinse well after)
If your brew suddenly slows down or tastes off:
Descale first. Don’t panic.
Troubleshooting problems people actually face
Coffee tastes weak
-
Cup size too big
-
Too little coffee
-
Wrong basket installed
Machine beeps or stops
-
Water reservoir not seated
-
Drip tray misaligned
-
Pod adapter not locked
Grounds in cup
-
Filter not seated
-
Grind too fine
I’ve fixed all of these without calling support.
Pro tips for better coffee (earned through mistakes)
-
Brew smaller than your mug size
-
Rich mode shines with milk drinks
-
Don’t chase strength with grind size alone
-
Cheap pods will always taste cheap
-
Clean it before it smells bad, not after
You Might Be Interested In
- How to Use a Single Use Milk Frother for Quick Frothing
- How to Use a Keurig?
- How to Use and Clean a Mini Milk Frother with Style
- How to Use a Budget-Friendly Mini Frother for Home Use
- How To Clean Mixpresso Coffee Maker?
Conclusion: use the machine, don’t fight it
The Ninja DualBrew is flexible, but it expects you to meet it halfway.
Once you understand:
-
Why pod brewing behaves differently
-
Why Over Ice exists
-
Why cup size matters more than people think
…it becomes easy to get consistent, good coffee without frustration.
You don’t need perfection.
You just need the right setup for what you’re brewing.
Author Bio
Asim Ali is a hands-on coffee equipment writer and home-brewing specialist with years of real-world experience using multi-function coffee makers, including the Ninja DualBrew system. His expertise comes not from theory or marketing materials, but from daily use, long-term testing, troubleshooting common failures, and helping everyday users fix frustrating brewing issues in real kitchens.
Rather than repeating manuals, Ali focuses on how machines actually behave over time—how settings interact, why certain brews fail, and what small adjustments consistently improve results. His writing is grounded in practical experience, honest limitations, and a clear understanding of how coffee makers perform outside ideal conditions. He prioritizes accuracy, transparency, and usability so readers can make better coffee with confidence, not guesswork.
FAQ’s
How do I use the Ninja DualBrew coffee maker for the first time?
The first time setup matters more than most people think. Before you brew any coffee, fill the water reservoir and run a full brew cycle with no coffee at all. This flushes out manufacturing residue and warms up the internal system, which helps with more stable brewing later. I’ve skipped this before and the first cup always tastes a little plasticky or flat.
After that, start simple. Use Classic brew, choose a smaller cup size than your mug actually holds, and don’t experiment with Rich or Over Ice yet. The goal of your first few brews isn’t perfection, it’s learning how the machine behaves. Once you get a clean, normal-tasting cup, then you can start adjusting strength and size confidently.
Can I brew with pods and ground coffee in the same day?
Yes, and this is one of the Ninja DualBrew’s biggest strengths but only if you swap the parts correctly. The machine physically brews differently depending on whether the pod adapter or the grounds basket is installed. Leaving the wrong one in is the fastest way to ruin a cup and think something’s broken.
In real life, I switch between pods in the morning and ground coffee later in the day all the time. Just slow down for five seconds, remove the adapter or basket you’re not using, and make sure the correct one clicks fully into place. The machine doesn’t always warn you if it’s wrong, it’ll just brew bad coffee.
Why does my Over Ice coffee taste better than regular iced coffee?
Because the Over Ice setting is doing more work than people realize. It brews the coffee stronger and more concentrated, expecting the ice to melt and dilute it. When you brew regular hot coffee over ice using Classic mode, the coffee is already balanced for hot drinking, so the ice just waters it down.
In my experience, if someone says “I hate iced coffee from coffee makers,” they’re usually skipping the Over Ice setting. When used correctly with enough ice in the cup, it produces a much more flavorful, smoother iced coffee that actually tastes intentional instead of accidental.
How often should I clean and descale the Ninja Dual Brew?
Cleaning doesn’t need to be obsessive, but it does need to be consistent. Rinsing the basket or pod adapter after brewing and emptying the drip tray prevents buildup that can affect flavor faster than you’d expect. Coffee oils go stale, and this machine makes it easy for them to hide in corners.
Descaling is the part people ignore until the machine forces the issue. If your brews slow down, taste dull, or the machine starts acting weird, it’s usually scale buildup. Every two to three months is realistic for most homes, sooner if you have hard water. Descaling regularly keeps the machine quiet, fast, and predictable.
Is Rich mode better than Classic?
Not better just different. Rich mode slows the brew slightly and extracts more from the coffee, which can be great for darker roasts, milk-based drinks, or pods that taste thin. But if your grind is already fine or your coffee is naturally strong, Rich mode can push it into bitter territory.
Classic mode is more forgiving and is what I use most days. Once you know how your beans or pods behave, Rich becomes a useful tool instead of a mystery button. Think of it as a strength tweak, not an automatic upgrade.