



A Keurig coffee maker is a convenient and popular choice for those who love their morning caffeine fix. Whether you’re a coffee connoisseur or just looking for a quick and easy way to brew a cup of joe, Keurig coffee makers offer a wide range of options. However, like any other machine, Keurig coffee makers require proper care and maintenance to ensure they continue to brew your favorite beverages perfectly.
One essential part of this maintenance is priming your Keurig machine. In this comprehensive guide, we will walk you through the step-by-step process of priming your Keurig coffee maker, ensuring that it continues to serve you the best cups of coffee.
What is Priming and Why It’s Important?
Priming is the process of removing air and other contaminants from the water lines of your Keurig coffee maker. It’s a crucial step in ensuring that your machine operates efficiently and delivers the best-tasting coffee.
Over time, air can get trapped in the water lines, causing your Keurig to malfunction or produce weak and uneven brews. If your Keurig is not properly primed, you might experience issues like slow water flow, incomplete brewing cycles, or even no water flow at all.
Priming your Keurig coffee maker can help in the following ways:
1. Preventing Clogs:
Removing air and contaminants from the water lines prevents clogs, which can affect water flow and brewing.
2. Consistent Brewing:
A well-primed Keurig ensures that your machine dispenses water consistently, resulting in a uniform and flavorful cup of coffee.
3. Extending the Lifespan:
Proper maintenance, including regular priming, can extend the lifespan of your Keurig coffee maker, saving you money in the long run.
4. Minimizing Bitter Tastes:
When your Keurig is not properly primed, it can dispense concentrated coffee grounds, leading to bitter-tasting brews.
Now that you understand the importance of priming your Keurig coffee maker let’s delve into the step-by-step process.

Step-by-Step Guide to Prime Your Keurig Coffee Maker
Priming your Keurig coffee maker is a simple process that can be completed in just a few minutes.
Here are the steps you need to follow:
Step 1: Gather Your Supplies
Before you start, make sure you have the following supplies ready:
- A Keurig coffee maker
- A clean, empty mug
- A source of clean water
Step 2: Power Up Your Keurig
Ensure your Keurig is plugged in and powered on. The machine should be in standby mode and ready for operation.
Step 3: Lift and Lower the Handle
Lift the handle of the Keurig machine to expose the K-Cup holder as if you were about to insert a coffee pod. Then, lower the handle without inserting a pod. This action punctures the K-Cup holder and initiates the priming process.
Step 4: Place a Mug
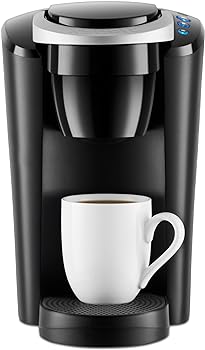
Position a clean, empty mug on the drip tray. Make sure it’s large enough to collect the water that will be dispensed during priming.
Step 5: Begin the Priming Process
Press the “Brew” or “Hot Water” button on your Keurig. The machine will start dispensing hot water into the mug. This process may take a few minutes, and you might hear some noise as the water is pumped through the system.
Step 6: Empty the Mug
Once the priming process is complete, the Keurig will dispense the hot water into the mug. Carefully remove the mug from the drip tray and empty it. This hot water helps clean and flush the internal water lines, removing any air or contaminants.
Step 7: Repeat the Process
In some cases, especially if your Keurig has not been used for a while, it’s a good idea to repeat the priming process once more to ensure thorough cleaning. Simply place the empty mug back on the drip tray and press the “Brew” or “Hot Water” button again.
Step 8: Complete the Priming
Once you’ve repeated the priming process (if necessary), your Keurig coffee maker should be properly primed. You can now use it to brew your favorite coffee or other beverages. Simply insert a coffee pod, select your brew size, and enjoy!
Conclusion
Priming your Keurig coffee maker is a simple yet crucial process that ensures your machine consistently delivers high-quality brews. By following the step-by-step guide provided in this article, you can keep your Keurig in excellent working condition, preventing clogs, enhancing the taste of your coffee, and extending the lifespan of your coffee maker.
Taking care of your Keurig through proper maintenance, including priming, will ensure you continue to enjoy the convenience of brewing your favorite beverages at home. Remember to repeat the priming process periodically to keep your Keurig operating at its best. If you encounter any persistent issues, don’t hesitate to consult your machine’s manual or reach out to Keurig’s customer support for further assistance.
In conclusion, with regular maintenance and priming, your Keurig coffee maker will provide you with consistent and delicious coffee for years to come.
You Might Be Interested In
- How To Use Cuisinart Coffee Maker With Grinder?
- How to Clean Gourmia Coffee Maker?
- How To Operate Cuisinart Coffee Maker?
- How To Make Espresso In Ninja Coffee Maker?
- How To Set Time On Cuisinart Coffee Maker?
Frequently Asked Questions
How often should I prime my Keurig coffee maker?
You should prime your Keurig whenever you notice issues with water flow, inconsistent brewing, or when your machine has been sitting unused for an extended period. It’s a good practice to prime your Keurig every few months to keep it in optimal condition.
Can I use a reusable K-Cup filter during the priming process?
It’s not necessary to use a reusable K-Cup filter during priming. A regular mug will work just fine. The goal is to flush the water lines with hot water to remove air and contaminants.
My Keurig still has issues even after priming. What should I do?
If you continue to experience problems with your Keurig coffee maker after priming, you may need to perform additional troubleshooting. This could involve descaling your machine, checking for clogs, or contacting Keurig’s customer support for further assistance.
Is there a specific type of water I should use for priming?
Use clean, filtered water for priming your Keurig. Avoid using distilled water, as it lacks minerals and can lead to scaling in your machine over time.
Do I need to prime my Keurig if I use it regularly?
Even if you use your Keurig regularly, it’s a good idea to prime it every few months to maintain optimal performance. Regular priming can help prevent potential issues from arising.