



Coffee is an integral part of many people’s daily routines. For those who prefer the convenience of brewing coffee at home, a Black and Decker coffee maker is a popular choice. Black and Decker have been a trusted brand for household appliances for decades, and their Black And Decker Coffee Makers are no exception. Whether you’re a seasoned coffee enthusiast or a beginner, using a Black and Decker coffee maker is a straightforward process that can be easily mastered.
In this comprehensive guide, we’ll walk you through the step-by-step instructions for using your Black and Decker coffee maker. From setting it up to brewing your first cup of coffee, we’ll cover all the essential aspects. Additionally, we’ll address five frequently asked questions to ensure that you have a seamless coffee-making experience.
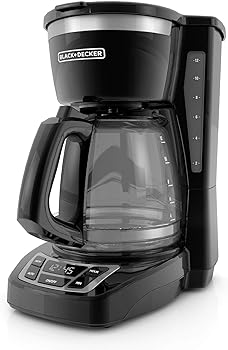
Step 1: Unboxing and Initial Setup
Before you can enjoy a fresh cup of coffee from your Black and Decker coffee maker, you need to start with the initial setup.
Here’s how to do it:
1. Unbox the Coffee Maker:
Carefully remove the coffee maker from its packaging. Ensure that all the included components are present, including the coffee pot, filter basket, and any additional accessories.
2. Clean the Coffee Maker:
It’s a good practice to clean the coffee maker before the first use. Wipe down the exterior with a damp cloth, and wash the coffee pot and filter basket with warm, soapy water. Rinse thoroughly and allow them to dry.
3. Place the Coffee Maker:
Find a suitable location for your Black and Decker coffee maker. It should be on a level, stable surface near a power outlet. Make sure there’s enough clearance above the machine to open the top lid and access the filter basket.
4. Plug In the Coffee Maker:
Insert the power cord into the machine and plug it into a grounded electrical outlet. Ensure the coffee maker is turned off (the power switch is in the “off” position) before plugging it in.
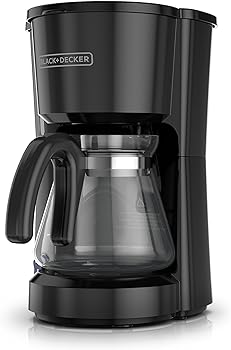
Step 2: Water Reservoir and Coffee Grounds
Now that your coffee maker is set up, it’s time to prepare it for brewing:
1. Fill the Water Reservoir:
Lift the top lid of the coffee maker to reveal the water reservoir. Depending on your model, you may have a removable reservoir or an integrated one. Fill the reservoir with the desired amount of cold, clean water. Be cautious not to overfill, as there is often a marked maximum fill line.
2. Add Coffee Grounds:
Open the filter basket by swinging it out. Place a paper coffee filter in the basket if your model requires one. Add your preferred coffee grounds to the filter. The amount of coffee grounds you use depends on your taste preferences and the coffee maker’s capacity. A general rule of thumb is one to two tablespoons of coffee grounds per six ounces of water, but feel free to adjust to your liking.
3. Close the Filter Basket:
After adding the coffee grounds, close the filter basket securely. Make sure it’s properly latched to prevent any grounds from spilling into the coffee pot.

Step 3: Brewing Your Coffee
With the water and coffee grounds in place, it’s time to start brewing your coffee:
1. Turn On the Coffee Maker:
Locate the power switch on your Black and Decker coffee maker, typically found on the front or side of the machine. Flip the switch to the “on” position to start the brewing process.
2. Wait for Brewing:
The coffee maker will heat the water and begin brewing. Depending on your model, this process may take a few minutes. You’ll hear the sound of water heating and dripping into the coffee pot.
3. Coffee Pot Placement:
Ensure that the coffee pot is correctly positioned on the warming plate beneath the filter basket. This is where your freshly brewed coffee will collect.
4. Brewing Time:
The brewing time can vary based on your coffee maker’s settings and the amount of water used. Typically, it takes around 5-10 minutes to brew a full pot of coffee. You can check the progress by looking through the coffee maker’s window or checking the coffee pot’s level.
5. Brewing Completion:
Once the brewing process is complete, the coffee maker will automatically turn off. You’ll hear a click, indicating that your coffee is ready to be served.
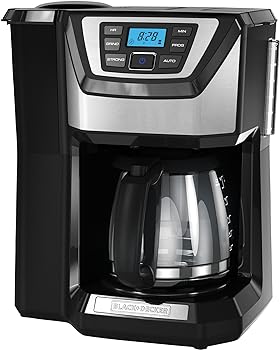
Step 4: Serving and Enjoying Your Coffee
Your coffee is now brewed and ready to be enjoyed.
Here’s how to serve it and make the most of your freshly brewed coffee:
1. Pour a Cup:
Carefully remove the coffee pot from the warming plate, and pour your desired amount of coffee into your cup or mug. Be cautious, as the coffee may still be hot.
2. Keep It Hot:
To keep the remaining coffee in the pot warm, return it to the warming plate on the coffee maker. The warming plate will maintain the coffee’s temperature for a while.
3. Add Your Preferences:
Customize your coffee by adding milk, cream, sugar, or any other flavorings you prefer. Stir your coffee to ensure everything is well-mixed.
4. Cleanup:
After you’ve poured your coffee, remember to turn off the coffee maker to conserve energy. Empty the filter basket of used coffee grounds and dispose of them. Wash the coffee pot and filter basket for future use.
Step 5: Cleaning and Maintenance
Proper cleaning and maintenance are essential to keep your Black and Decker coffee maker functioning optimally and producing delicious coffee.
Here are some key steps to ensure longevity:
1. Regular Cleaning:
Clean the coffee maker at regular intervals to prevent mineral buildup, which can affect the taste of your coffee. Mix equal parts of white vinegar and water and run a brew cycle without coffee grounds. This will help describe the internal components. Follow this with a couple of brew cycles using only water to rinse out any remaining vinegar.
2. Clean the Exterior:
Wipe down the exterior of the coffee maker regularly to remove any coffee splatters or stains. A damp cloth with a mild detergent should do the trick. Make sure to unplug the coffee maker before cleaning.
3. Wash Removable Parts:
If your coffee maker has removable parts, such as the water reservoir and coffee pot, wash them thoroughly after each use. You can clean them with warm, soapy water and a non-abrasive sponge or cloth.
4. Replace the Water Filter:
Some Black and Decker coffee makers come with water filters. Replace the water filter as recommended in the user manual to ensure the best flavor and quality in your coffee.
5. Check the Power Cord:
Inspect the power cord for any signs of wear or damage. If you notice any issues, it’s essential to replace the cord to maintain safety.
6. Descaling:
If you have particularly hard water, consider using a coffee maker descaling solution as recommended in the user manual. Descaling helps remove mineral deposits that can affect the coffee maker’s performance.
Conclusion
Using a Black and Decker coffee maker is a straightforward process that, when followed correctly, can result in delicious, freshly brewed coffee. From the initial setup to brewing your coffee, maintaining your machine, and addressing common questions, this guide has covered all the essential steps to help you make the most of your Black And Decker Coffee Maker.
By following the step-by-step instructions and keeping your Black And Decker Coffee Maker clean and well-maintained, you can enjoy consistently excellent coffee in the comfort of your own home. Remember that experimenting with coffee grounds, water temperature, and other variables can help you tailor your coffee to your unique taste preferences.
We hope this comprehensive guide has been helpful in demystifying the process of using your Black and Decker coffee maker, making your daily coffee routine a breeze.
You Might Be Interested In
- How to Clean Gourmia Coffee Maker?
- How To Make Amaretto Coffee Creamer?
- How To Operate A Cuisinart Coffee Maker?
- How To Use Keurig Coffee Maker Single Cup?
- How To Make Chick-fil-A Frosted Coffee?
Frequently Asked Questions
How much coffee should I use for a full pot?
The recommended amount of coffee grounds for a full pot typically ranges from one to two tablespoons of coffee grounds for every six ounces of water. However, feel free to adjust the amount to suit your personal taste preferences. Experiment to find the perfect coffee-to-water ratio that suits you best.
Can I use ground coffee or coffee pods with my Black and Decker coffee maker?
Most Black and Decker coffee makers are designed to work with ground coffee. Using coffee pods or capsules may not be compatible with all models. Always refer to your coffee maker’s user manual to confirm its compatibility with different coffee types.
What is the best water temperature for brewing coffee?
The ideal water temperature for brewing coffee is between 195°F (90.6°C) and 205°F (96.1°C). If your Black and Decker coffee maker doesn’t specify a temperature, rest assured that it is designed to reach the optimal brewing temperature for a flavorful cup of coffee.
How do I describe my coffee maker?
To describe your coffee maker, mix a solution of equal parts white vinegar and water. Run a brew cycle with this solution, and then follow it with a couple of cycles using only water to rinse. The vinegar will help remove mineral deposits that can affect the taste of your coffee. Remember to rinse the coffee maker thoroughly after descaling.
Why is my coffee maker not turning on?
If your coffee maker is not turning on, check the power source and ensure it’s correctly plugged in. Make sure the power switch is in the “on” position. If the problem persists, consult your coffee maker’s user manual for troubleshooting tips. If all else fails, contact Black and Decker’s customer support for assistance.